


Table of Contents
- What Determines EV Charger Installation Costs
- Electrical Panel Capacity and Upgrade Requirements
- Distance From Electrical Panel to Charger Location
- Charging Station Type and Power Output
- Permitting, Inspection, and Code Compliance Costs
- Labor Costs and Installation Timeline for Level 2 Chargers
- Federal Tax Credits and Incentives for EV Charging Equipment
- Site Conditions and Installation Complexity
- Frequently Asked Questions
Last Updated: October 1, 2026
What Determines EV Charger Installation Costs
EV charger installation costs depend on eight critical factors that homeowners often overlook. Understanding these factors helps you budget accurately and avoid surprises.
The difference between a straightforward $800 installation and a complex $4,000+ project usually comes down to electrical infrastructure, distance from your panel, and local permitting requirements.
Here’s what actually drives the price tag:
- Your home’s electrical panel capacity
- Distance from the panel to the charger location
- Type of charging equipment you choose
- Local permitting and inspection processes
- Labor costs in your region
- Site conditions and installation complexity
- Available federal tax credits and incentives
- Whether your home needs electrical upgrades first
Let’s break down each factor so you know exactly what to expect.
Electrical Panel Capacity and Upgrade Requirements
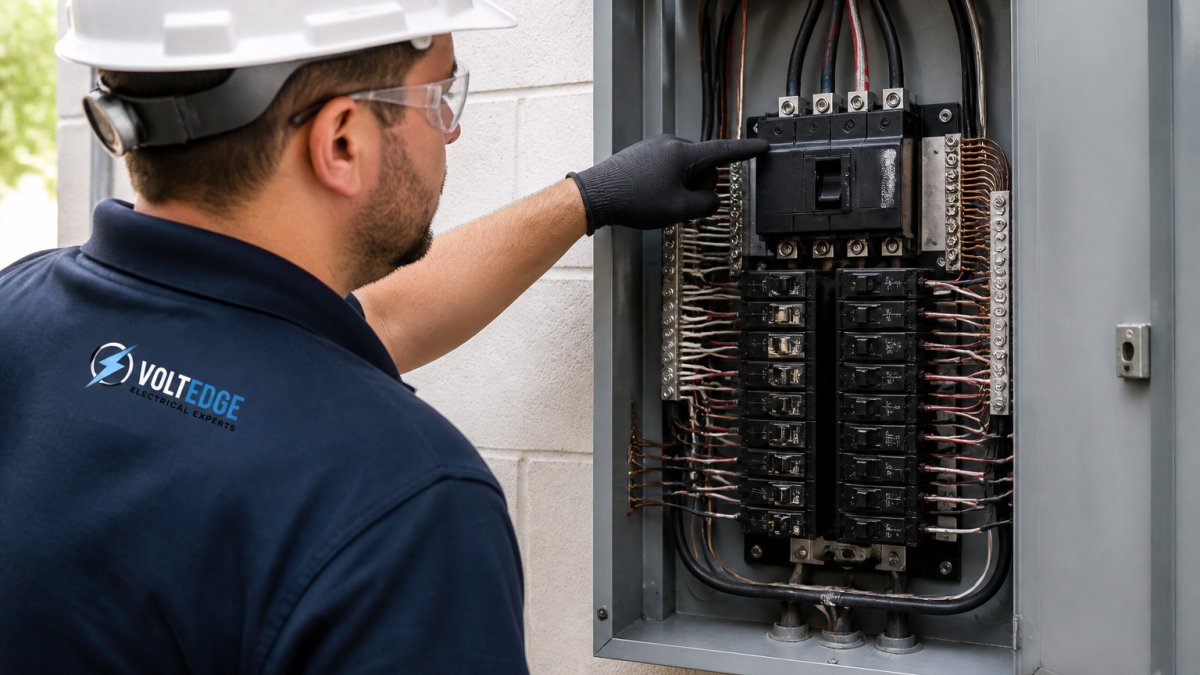
Your home’s electrical panel is the foundation of any EV charger installation. A Level 2 charging station typically requires 40-50 amps of dedicated circuit capacity. Older homes often have 100-amp or 150-amp panels already running near capacity. If your panel lacks available space or sufficient amperage, a full service entrance upgrade can cost significantly more than the charger itself, involving main breaker replacement, new conduit, and potential transformer upgrades.
Here’s the practical reality:
- Panels built after 2000 usually have spare capacity
- Homes from the 1970s-1990s often need upgrades
- A 200-amp service upgrade is more common than you’d expect
- Load calculation determines if you truly need an upgrade or just a new circuit
Have a licensed electrician perform a load calculation before committing to installation. This assessment shows whether your existing panel can safely support the charger or if you need a full upgrade, saving most homeowners from expensive surprises.
Request the load calculation in writing. Your electrician should document current amperage usage and available capacity. This becomes critical if you plan to add more electric vehicles later, future-proofing your electrical system now prevents a second expensive upgrade down the road.
Distance From Electrical Panel to Charger Location
The distance between your electrical panel and charger location directly affects labor costs and materials. Longer distances require more conduit, wire, and labor. Running lines 50+ feet means trenching or running conduit along your exterior, using larger gauge wiring to prevent voltage drop, and installing additional junction boxes.
Underground conduit runs require careful planning. You’ll need to call your utility locating service (usually free) to mark existing gas, water, and cable lines before digging. Missing this step can result in hitting buried utilities, a costly and dangerous mistake that stalls your entire project.
Charging Station Type and Power Output
Not all EV chargers are created equal. Your choice between different equipment directly affects installation complexity and cost.
Permitting, Inspection, and Code Compliance Costs
Every jurisdiction requires permits and inspections for EV charger installations, a legal requirement that protects your home and ensures National Electrical Code compliance. Permitting involves submitting plans, paying fees ($50-300), scheduling inspection, and receiving final approval before energizing the charger.
Never skip permitting to save money. An unpermitted installation voids your home’s electrical warranty, creates liability if something goes wrong, and makes it difficult to sell your home later. Inspectors specifically look for unpermitted work during home sales.
Labor Costs and Installation Timeline for Level 2 Chargers
Labor is typically the largest cost component. A straightforward installation with available panel capacity and nearby charger location takes 4-8 hours, including circuit installation, conduit, mounting, and testing. Complicated installations with panel upgrades or long runs take 2-3 days or more.
Federal Tax Credits and Incentives for EV Charging Equipment
Federal and utility incentives can reduce your net installation cost by 40-60%.
Federal Tax Credit
Utility-Specific Rebates and Load Management Programs
Common utility programs include:
- Time-of-use (TOU) rebates: Many utilities offer $200-$500 rebates for smart chargers that shift charging to off-peak hours (9 PM-6 AM), requiring WiFi connectivity and program enrollment.
- Load management system (LMS) incentives: Some utilities offer $300-$1,000 rebates for LMS installation, which intelligently distributes power between multiple chargers. Critical for homes with limited panel capacity (100-150 amps) wanting to support multiple EVs without a full service upgrade.
- Off-peak charging programs: Some utilities offer reduced electricity rates (20-40% lower) for charging during designated off-peak windows. Enrolling in these programs is free and can save $200-$400 annually in charging costs.
- Demand response programs: Utilities in competitive markets sometimes offer $100-$300 annual payments to customers who allow the utility to remotely manage their charger during peak demand periods.
- New construction incentives: If you’re building a new home, some utilities offer rebates for pre-wiring homes with EV-ready electrical infrastructure (oversized panels, dedicated circuits, conduit runs).
Finding Your Utility’s Programs
Future-Proofing for Multiple Electric Vehicles
Two approaches exist:
- Install two chargers now: If your panel has sufficient capacity (typically requires 200+ amps), installing two 40-amp Level 2 chargers costs only slightly more than installing one. You avoid the cost of a second permit, inspection, and electrician visit later. Many utilities offer rebates for dual-charger installations.
- Install one charger with load management: If your panel is at capacity, install a single charger paired with a load management system. An LMS allows you to add a second charger later without upgrading your service entrance. The LMS monitors total household electrical load and reduces charger output if necessary to prevent panel overload. This approach costs $500-$1,200 more upfront but saves $2,000-$4,000 by avoiding a service upgrade later. Some utilities rebate 30-50% of LMS costs.
Before finalizing your installation plan, contact your utility company and ask three specific questions: (1) Do you offer rebates for smart chargers or load management systems? (2) Are there pre-approval requirements? (3) What is the timeline for rebate processing and payment? Some utilities pay rebates within 30 days; others take 6+ months. Knowing this affects your cash flow planning.
Stacking federal tax credits with utility rebates can reduce your net installation cost by $1,500-$2,500. The effort to research utility programs takes 1-2 hours but often pays for itself. If you plan to own multiple EVs, discussing load management options now prevents expensive future upgrades.
Site Conditions and Installation Complexity
Real-world installation conditions often create unexpected challenges that affect your final cost. What looks straightforward on paper can become complicated once the electrician assesses your actual property. Among all site factors, home age is the most significant cost driver that homeowners and many installers underestimate.
Home Age and Electrical Compliance
Common compliance upgrades in older homes include:
- Grounding system upgrades: Homes built before the 1960s often lack proper ground rods or grounding conductors. Modern EV chargers require a dedicated ground path. Installing or upgrading grounding can add $300-$800 to your project.
- Service entrance replacement: Homes with 60-amp or 100-amp panels installed before 1990 may have corroded or undersized service entrance conductors. Replacing the service entrance (the main wires from the utility meter to your panel) can cost $1,500-$3,000.
- Aluminum wiring remediation: Homes wired with aluminum branch circuits (common in the 1970s) present fire hazards. Code requires either replacing aluminum wiring or installing special connectors and breakers rated for aluminum. This can add $500-$2,000 depending on extent.
- Knob-and-tube wiring removal: Homes built before 1950 may still have knob-and-tube wiring in walls. Code typically requires removal or isolation before adding new high-amperage circuits. Removal is labor-intensive and can cost $1,000-$3,000.
- Panel location and accessibility: Older homes sometimes have panels in basements, attics, or exterior walls that are difficult to access. Relocating a panel to meet code accessibility requirements can add $500-$1,500.
Other Site Complications
- Masonry or concrete: Drilling through brick, stone, or concrete to run conduit costs more than running lines along vinyl siding. Expect an additional $200-$600 for masonry drilling.
- Detached structures: Garages, workshops, or carports require longer runs and potentially underground conduit. Underground runs add $500-$1,500+ depending on distance and soil conditions.
- Landscaping obstacles: Mature trees, gardens, or hardscaping force electricians to route conduit around them, increasing labor time by 2-4 hours.
- Weather and season: Trenching during winter or in heavy rain takes longer and may require additional equipment. Summer installations are typically faster but more expensive due to higher demand.
- Accessibility issues: Tight crawl spaces, attics, or finished basements make routing wiring more time-consuming, adding 2-6 hours of labor.
Never assume your electrical system is code-compliant just because it’s been working. Building inspectors specifically scrutinize homes built before 2000 during EV charger installations. Discovering compliance issues after work begins can halt your project and force expensive mid-installation changes.
Frequently Asked Questions
How much does it cost to install an EV charger at home?
EV charger installation costs vary widely based on electrical panel capacity, distance from the panel to the charger location, and whether upgrades are needed. A Level 2 charger installation can range significantly depending on your home’s electrical infrastructure and local labor rates. For an accurate quote tailored to your specific situation, contact a licensed electrician who can assess your electrical system and provide transparent pricing.
Does my electrical panel need an upgrade for an EV charger?
Whether you need an electrical panel upgrade depends on your current panel capacity and amperage. Most Level 2 chargers require a dedicated 40-60 amp circuit. If your home has an older 100-amp service or limited available capacity, a panel upgrade may be necessary. A licensed electrician can perform a load calculation to determine if your existing panel can safely support the charger without exceeding code limits set by the National Electrical Code.
What is the timeline for Level 2 EV charger installation?
A straightforward Level 2 charger installation typically takes 1-3 days once permitting is approved. However, the total timeline from initial assessment to completion can extend 2-4 weeks if your home requires electrical panel upgrades or significant conduit and wiring runs. Permitting and inspection timelines vary by location. Homes with outdated electrical systems may face longer installation periods due to compliance requirements and the complexity of upgrading infrastructure.
Is there a federal tax credit for EV charger installation?
Yes, the federal Inflation Reduction Act offers a tax credit for qualified electric vehicle supply equipment installation. Homeowners can claim up to $1,000 for the cost of installing a Level 2 charger. The credit applies to equipment and labor costs for qualified installations. Check current IRS guidelines to confirm eligibility, as requirements and credit amounts may change. Consult a tax professional to ensure your installation qualifies and to maximize available incentives.
